Configuration
Integration guidance, organization keys, tenant rent payments (Stripe), Checkr screening defaults, and tenant upload settings.
Showing Web screenshots
Switch between web app and mobile app screenshots. Step text is the same; mobile images can be uploaded separately.
Opening Configuration and understanding the tabs
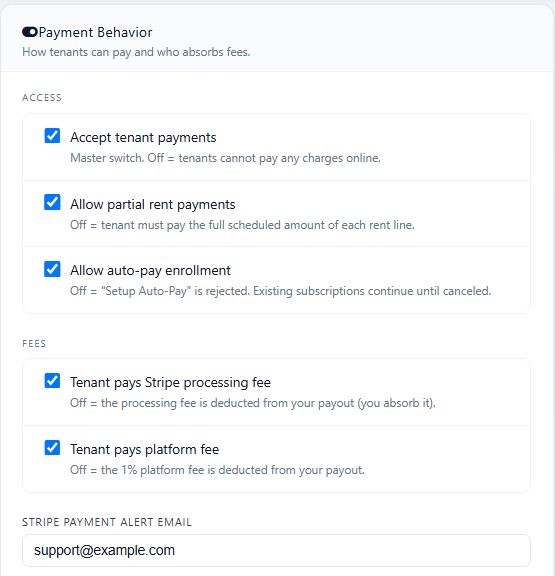
In the account portal, click Configuration in the sidebar.
Tabs:
- Guidance — expandable help for each integration (Stripe, Plaid, Firma, Checkr, QuickBooks, accounting).
- Organization keys — per-org API keys and toggles (e.g. Plaid client IDs, Firma workspace IDs). Stripe platform keys are managed by Tenantivo, not here.
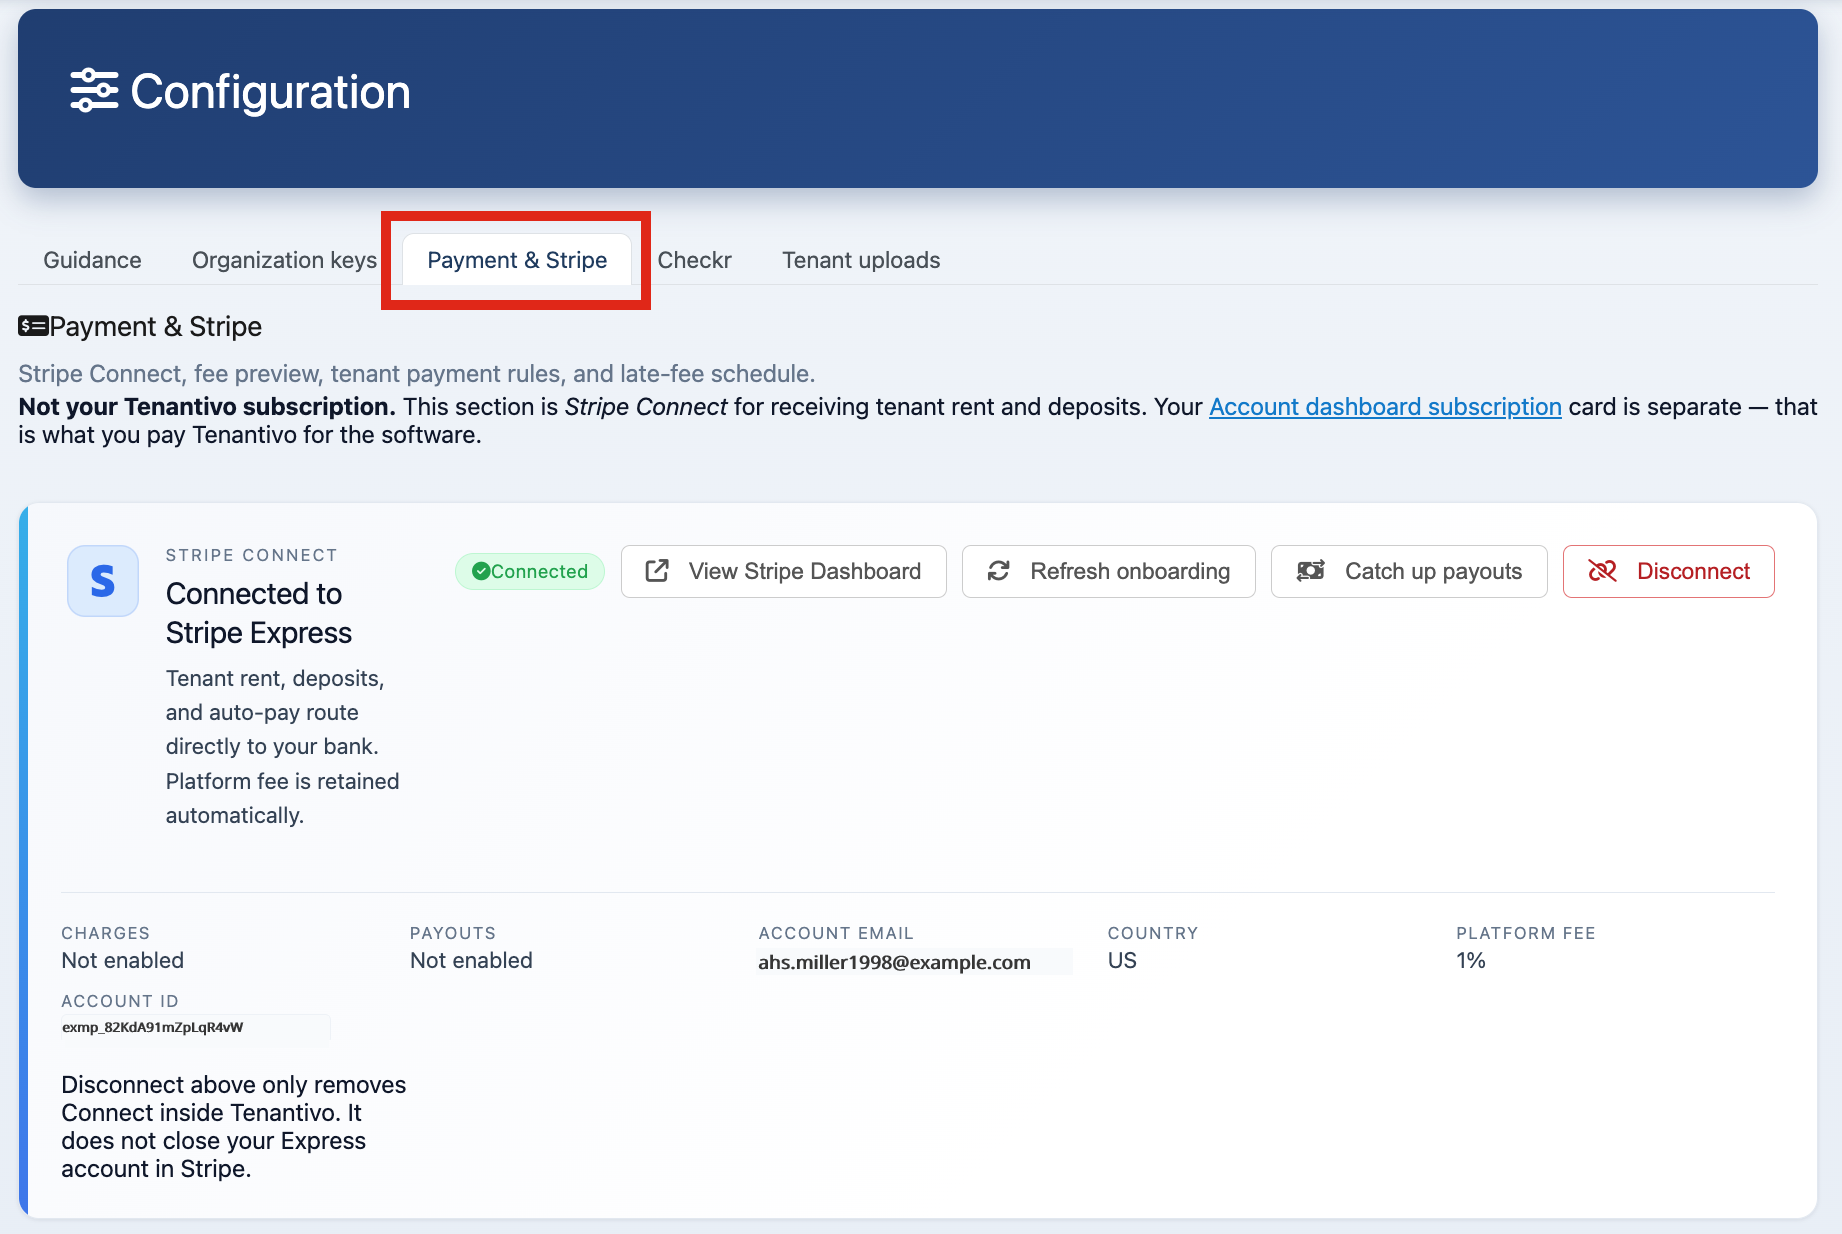
- Payment & Stripe — Stripe Connect onboarding, accept-payments toggle, fee absorption, late fees, auto-pay, and fee preview. After Connect, finish Get paid (Identity, company documents, per-rental property authority). New landlord Connect accounts stay on a payout hold until the account is both 14 days old and has 10 settled payments (at most 3 of those 10 can be cards). Bank payments during that hold wait for Tenantivo review before they charge. See Managing Rental Income and Payouts.
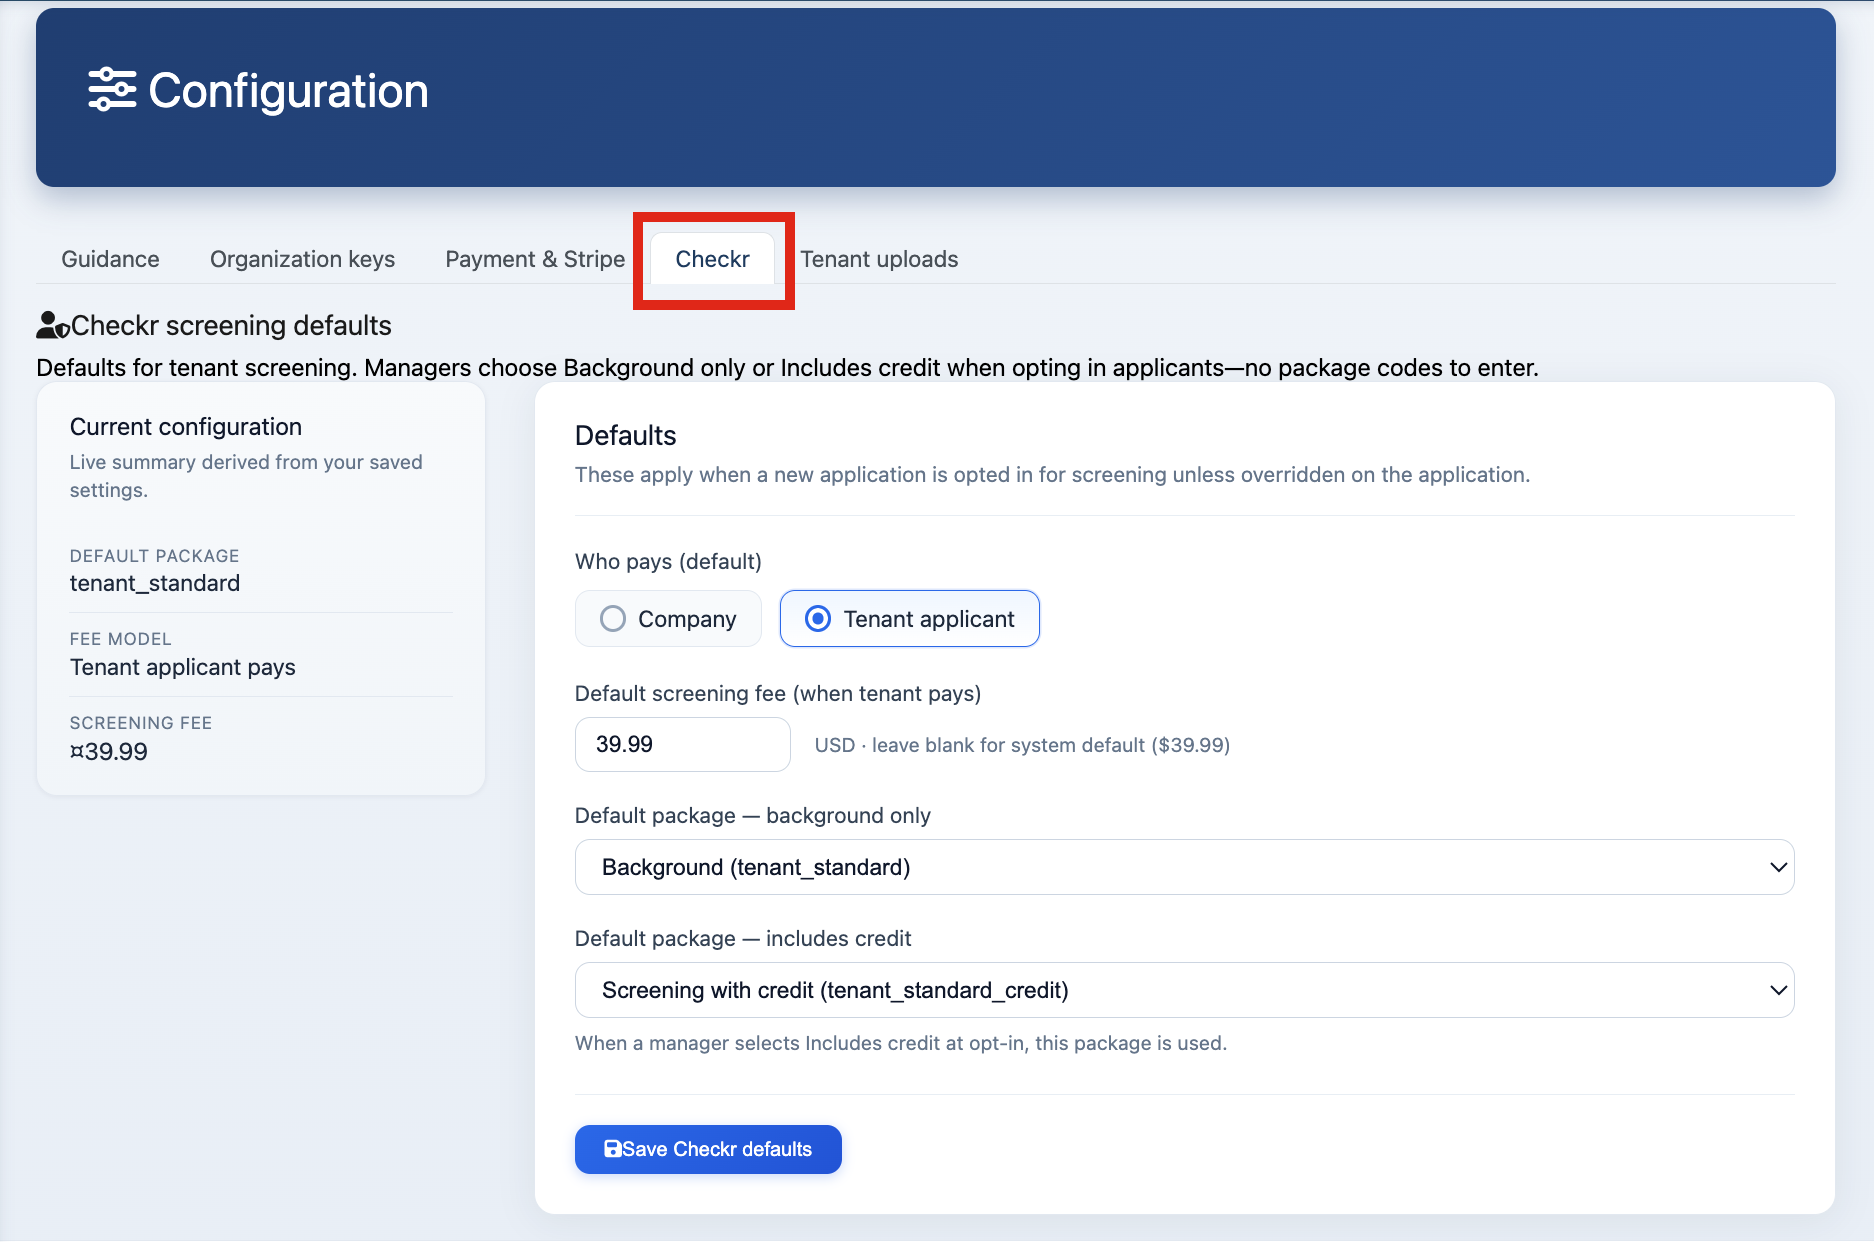
- Checkr — default screening packages, payer, and screening fee for new applications.
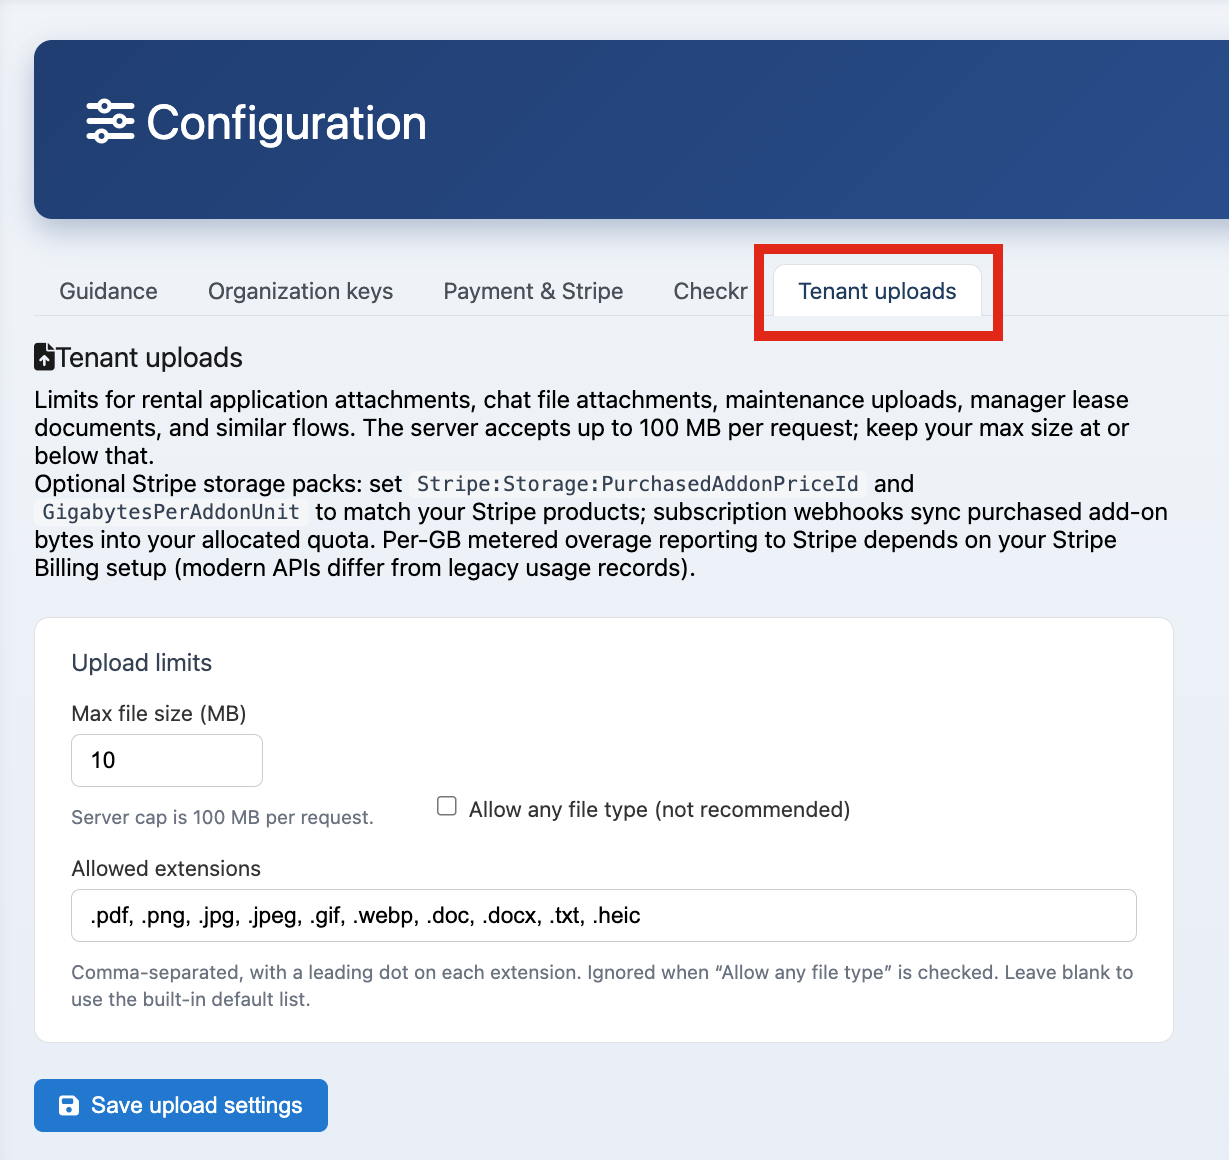
- Tenant uploads — settings for documents tenants can upload in the portal.
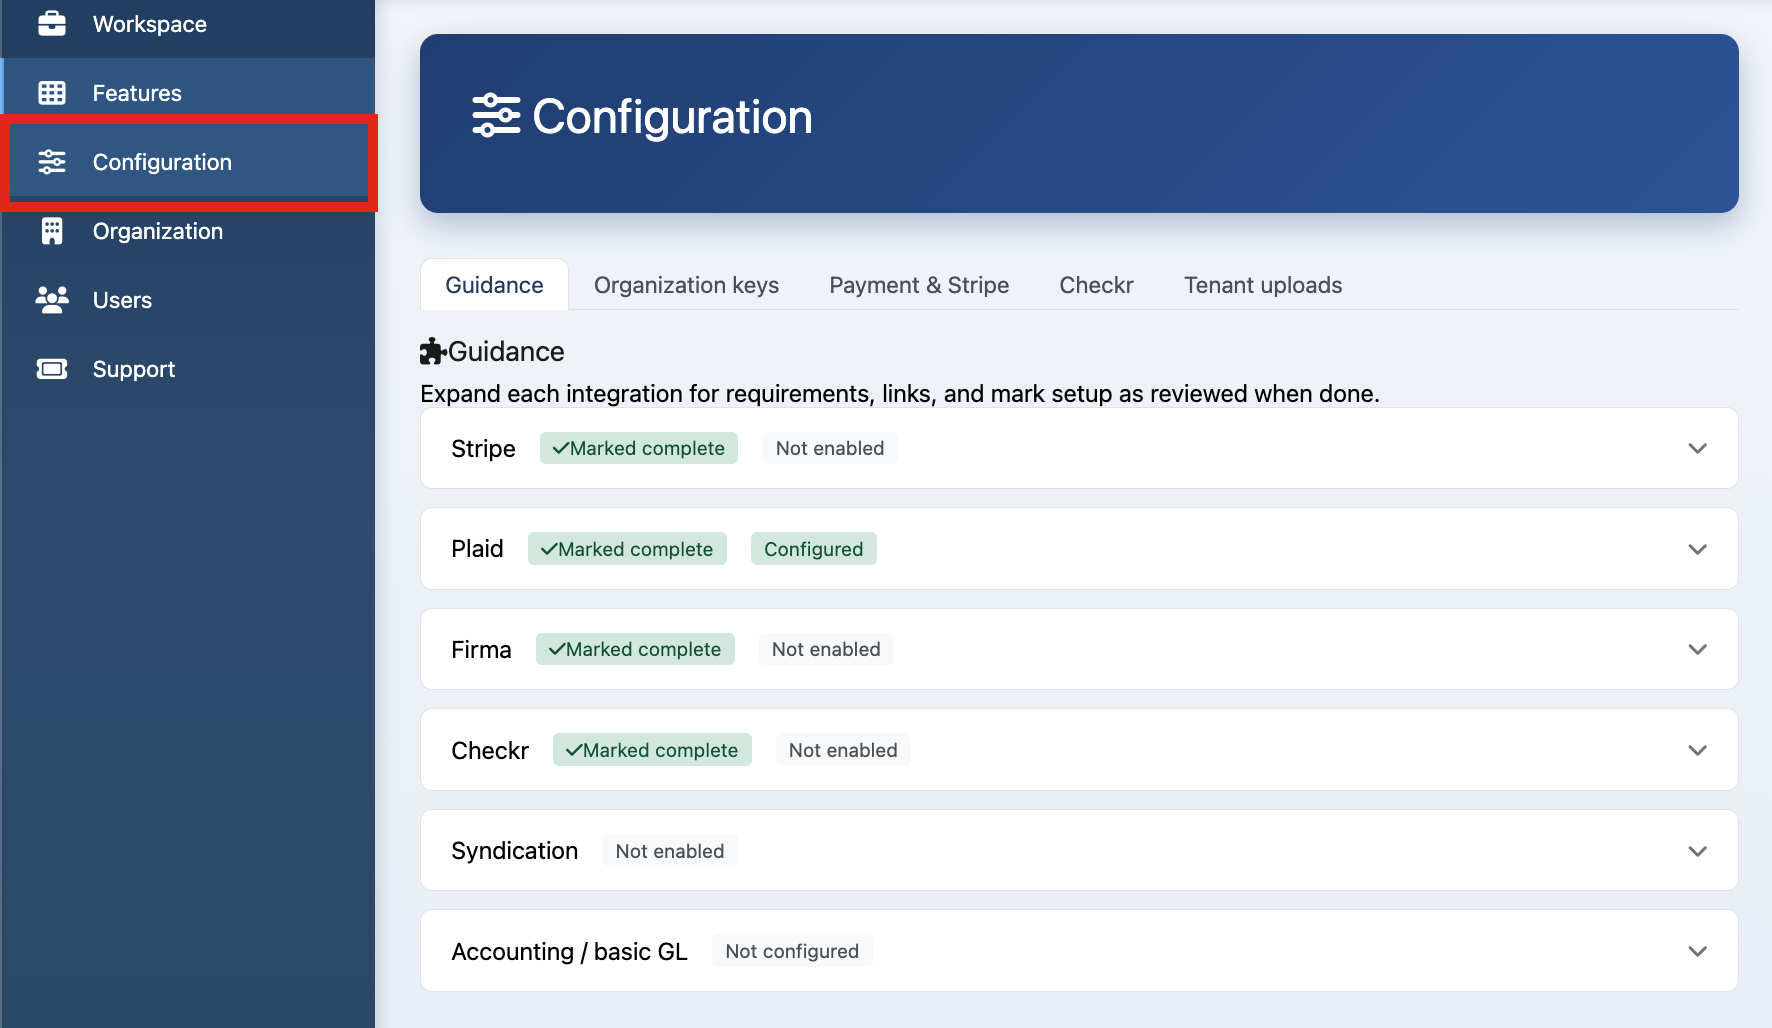

Guidance tab — integrations overview
Expand each integration on the Guidance tab for requirements, setup steps, and links to detailed training:
- Stripe / tenant payments — Workspace → Payments training; connect and configure under Payment & Stripe.
- Plaid — bank linking and transaction import; Plaid training; org keys under Organization keys.
- Firma — e-signatures for leases; Firma training; enabled by Tenantivo, optional workspace IDs in Organization keys.
- Checkr — Tenantivo provisions API access; set defaults on the Checkr tab (not Organization keys).
- QuickBooks, accounting — see linked training topics from each guidance panel.
Mark integrations as reviewed when setup is complete so your team knows what is ready.
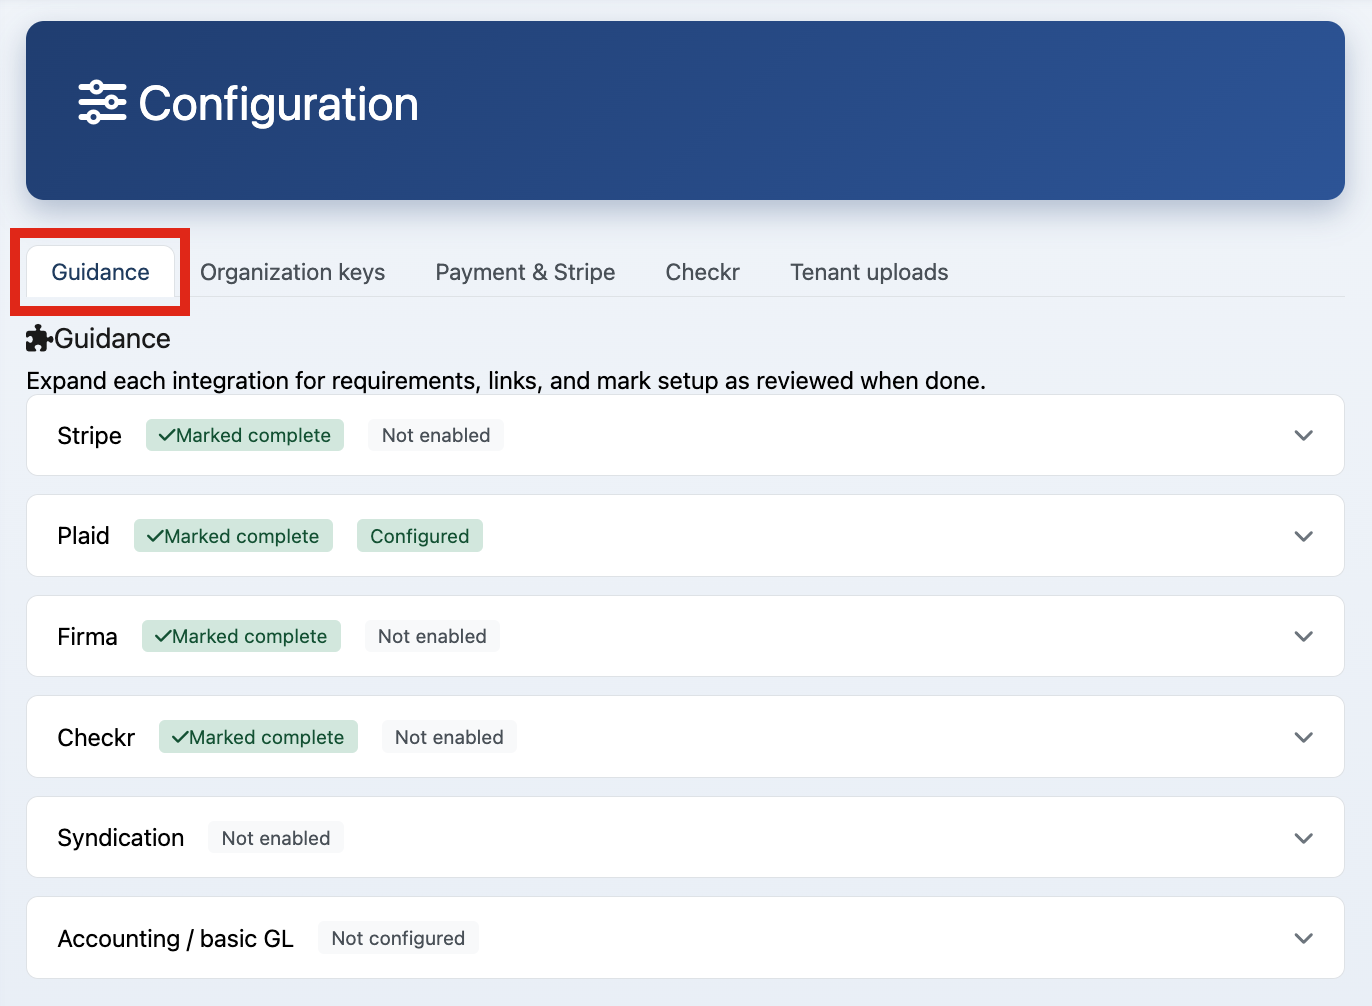

Organization keys tab
- Open Organization keys.
- Enter required API keys or IDs for each integration (e.g. Plaid, optional Firma workspace IDs).
- Toggle Active to enable or disable each integration.
- Save changes.
Note: Checkr and Stripe platform credentials are provisioned by Tenantivo administrators; Account Managers configure Checkr defaults on the Checkr tab and tenant rent on Payment & Stripe.
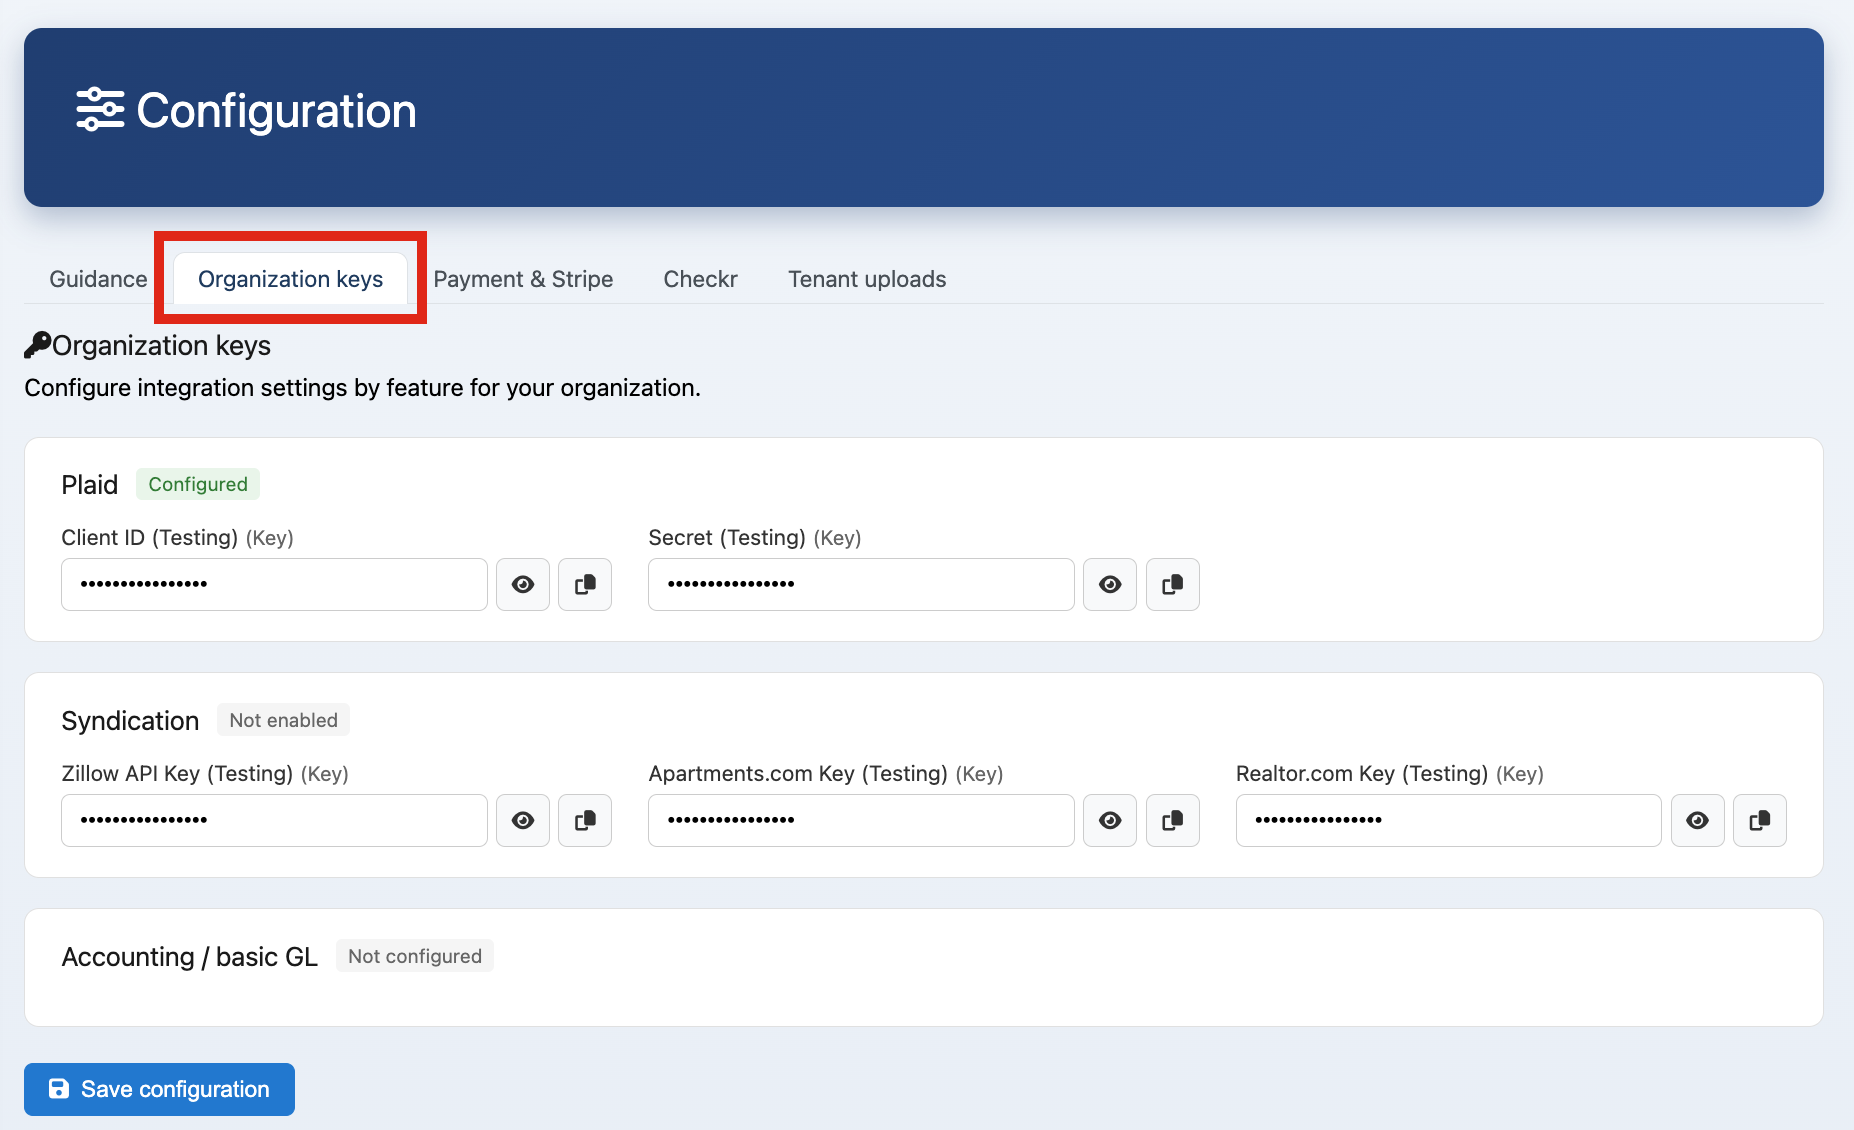

Payment & Stripe tab
This tab is your control center for tenant rent and deposit payments (separate from your Tenantivo subscription billing):
- Connect with Stripe — Stripe Express onboarding so rent routes to your bank. Then complete Get paid at
/Owner/Onboarding/Checklist. New landlord payouts stay manual until 14 days and 10 settled payments (at most 3 cards count). - Accept payments — master switch to pause all tenant charges.
- Fee absorption, partial payments, auto-pay, late fees — see Payments training for full detail.
A live fee preview against a sample rent charge shows what the tenant pays vs. what you receive before you save.

Checkr tab — screening defaults
- Open the Checkr tab.
- Select default screening packages.
- Choose who pays for screening (applicant or organization).
- Set the screening fee.
- Save changes.

Tenant uploads tab
- Open Tenant uploads.
- Select allowed document types for tenants.
- Set any upload limits if applicable.
- Save changes.
Tip: Align upload requirements with your application checklist so tenants know what to provide upfront.

How configuration affects management users
What to know: Organization-level configuration applies to everyone using the management app for your org. When you disable a module or turn off accept-payments, managers and tenants see the result immediately or on next login. Account Manager & Managers only pages (Organization, Users, subscription billing) are not visible in the management app.
Best practice: Communicate with your team before turning off a feature they rely on.