Transactions
Review imported and manual transactions, use row colors to track review status, and approve or flag items that need attention.
Showing Web screenshots
Switch between web app and mobile app screenshots. Step text is the same; mobile images can be uploaded separately.
Opening the Transactions page
- Sign in to the Management app.
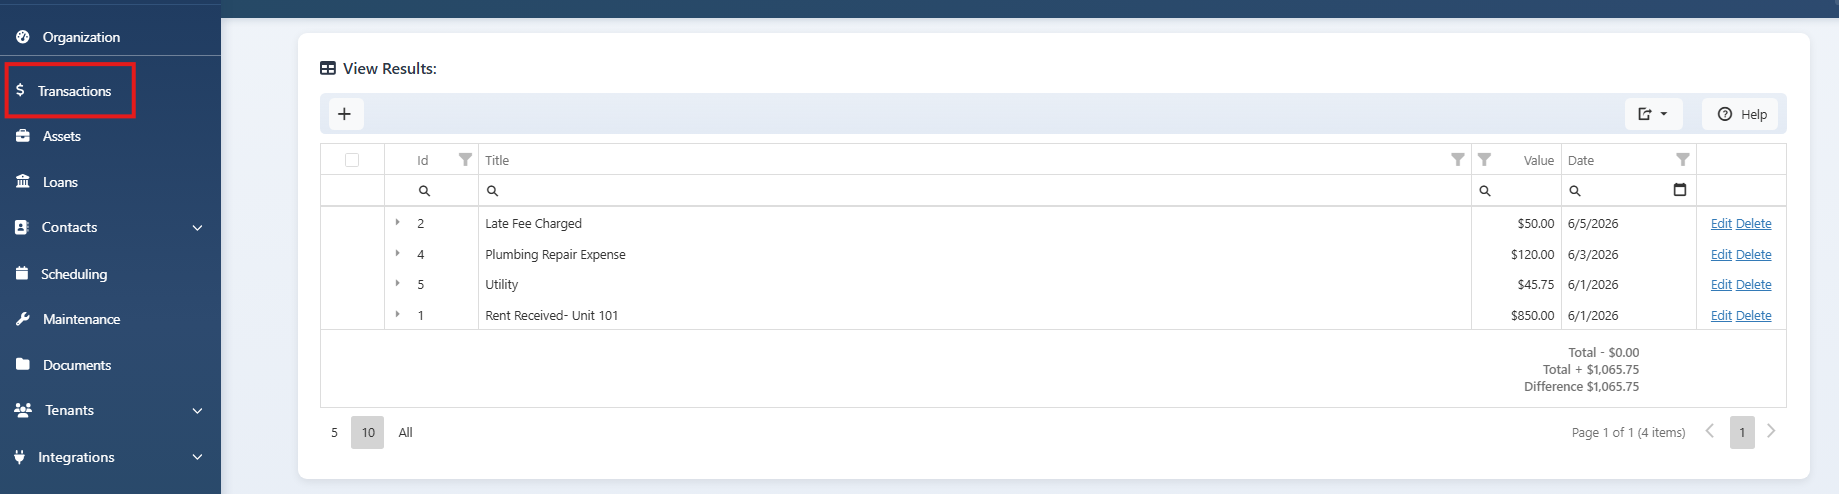
- Click Transactions in the left sidebar (or go to /Transaction/Index).
- Review the transactions grid: each row shows Title, Value, and Date.
- Use the Year and Month filters at the top to load the period you want to review.
Tip: Totals at the bottom of the grid show negative, positive, and net amounts for the filtered period.

Understanding row colors (review status)
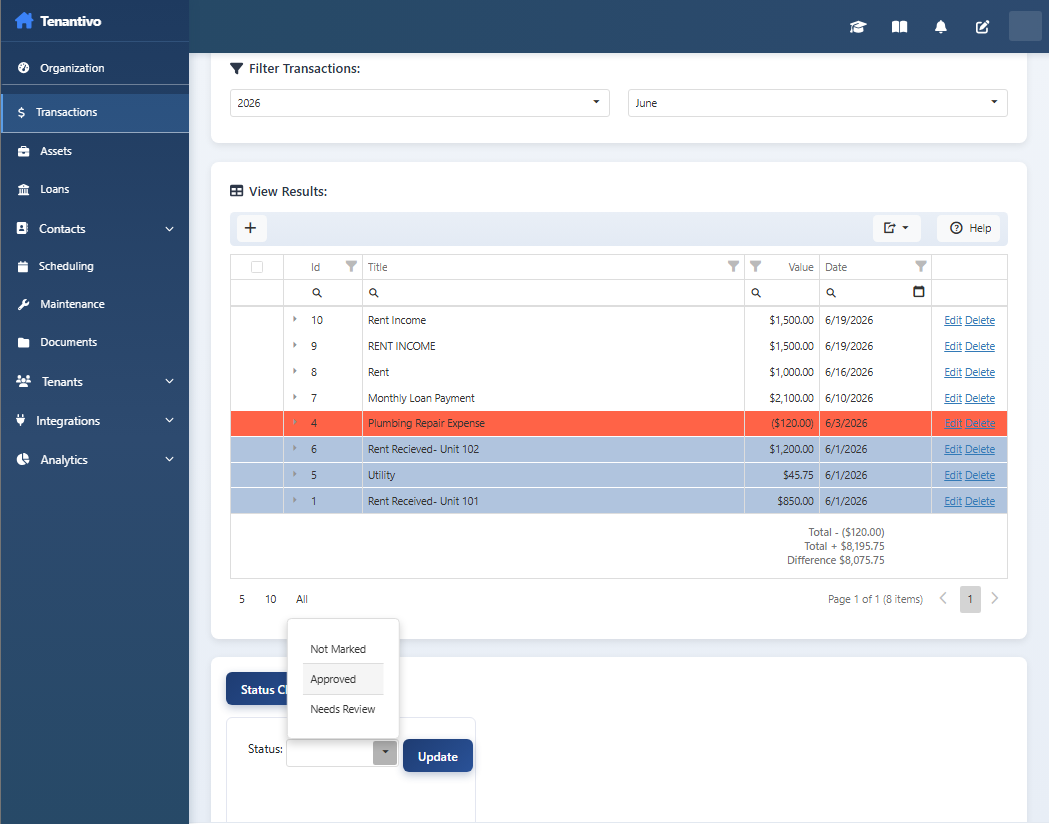
Each transaction row is color-coded so you can see its review status at a glance:
- No highlight (white/default) — Not Marked. The transaction has not been reviewed yet.
- Light blue — Approved. You have reviewed and approved this transaction.
- Red / tomato — Needs Review. This transaction still needs your attention or follow-up.
Why it matters: Use row colors during monthly review so approved items are easy to spot and unresolved items stay visible until you mark them.

Selecting transactions to update
- In the transactions grid, use the row checkboxes to select one or more transactions.
- You can select multiple rows at once when you want to apply the same status to a batch.
- Clear the selection if you need to choose a different set of rows.
Tip: Filter by year and month first so you are reviewing the correct statement period before selecting rows.

Marking status and approving changes
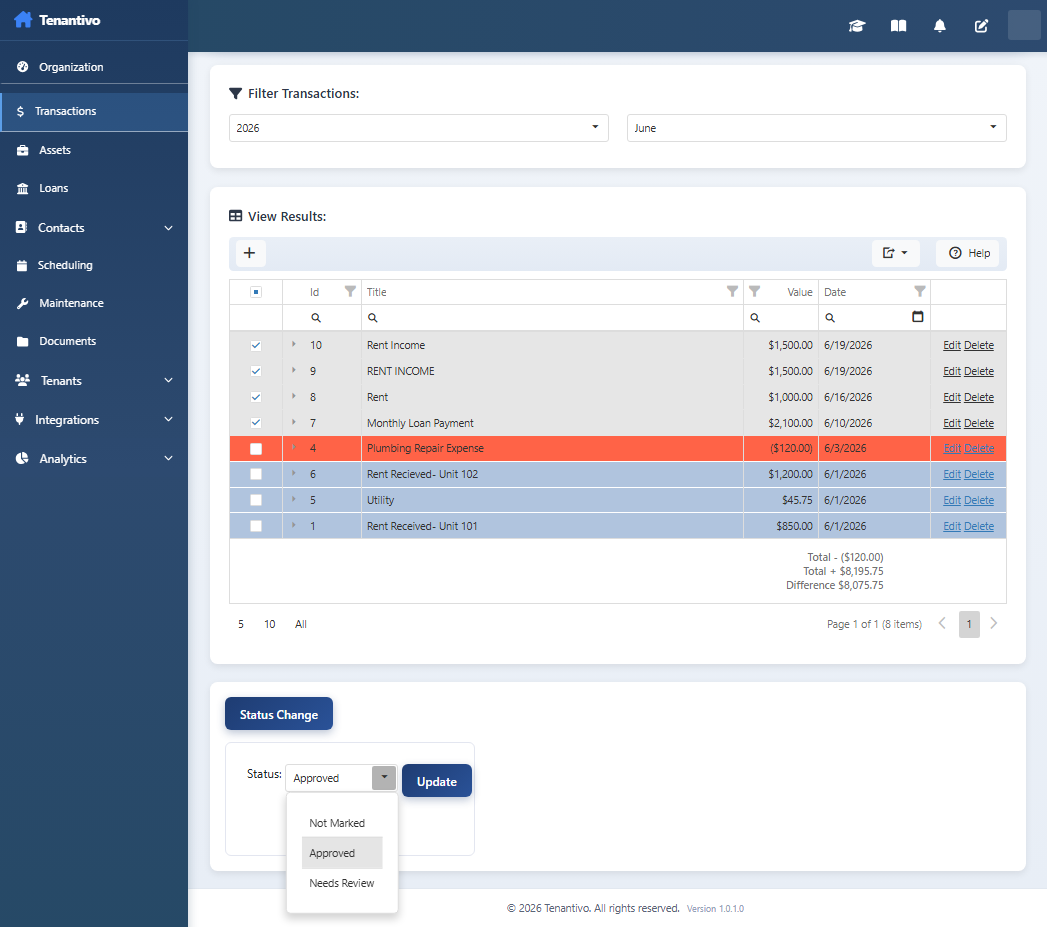
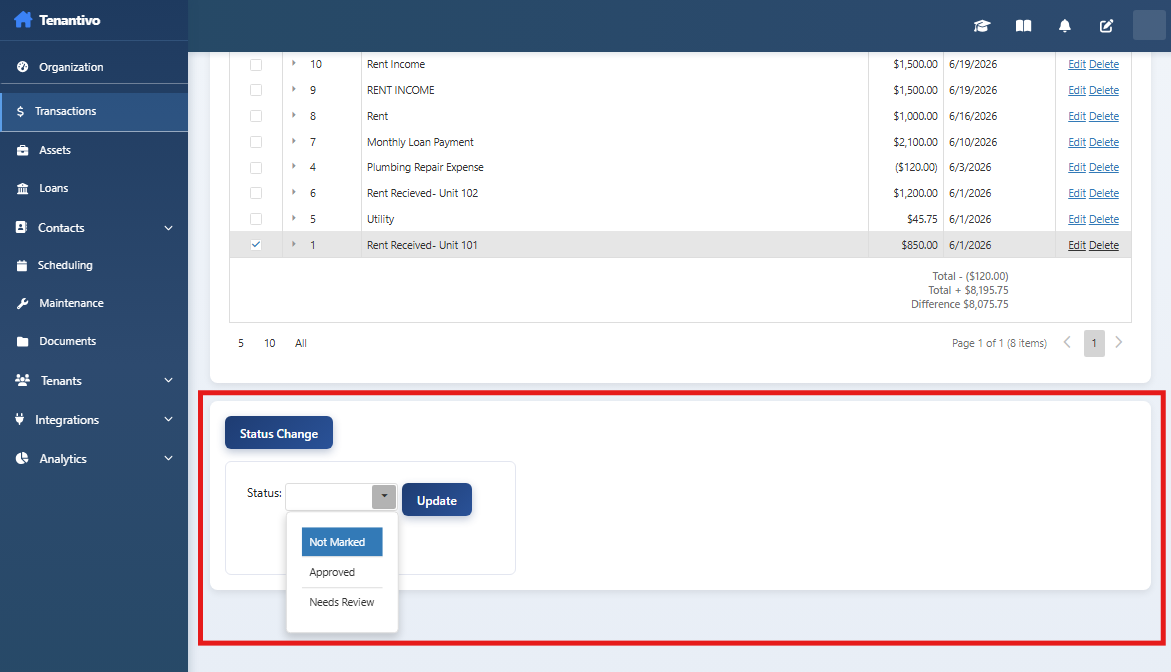
- Below the grid, click Status Change to open the status panel.
- In the Status dropdown, choose Not Marked, Approved, or Needs Review.
- With the correct rows still selected, click Update.
- The selected transactions are saved with the new status. Row colors update to match: blue for approved, red for needs review, default for not marked.
Best practice: Mark transactions as Needs Review when something looks wrong, then fix or link them before changing the status to Approved.

Adding a new transaction
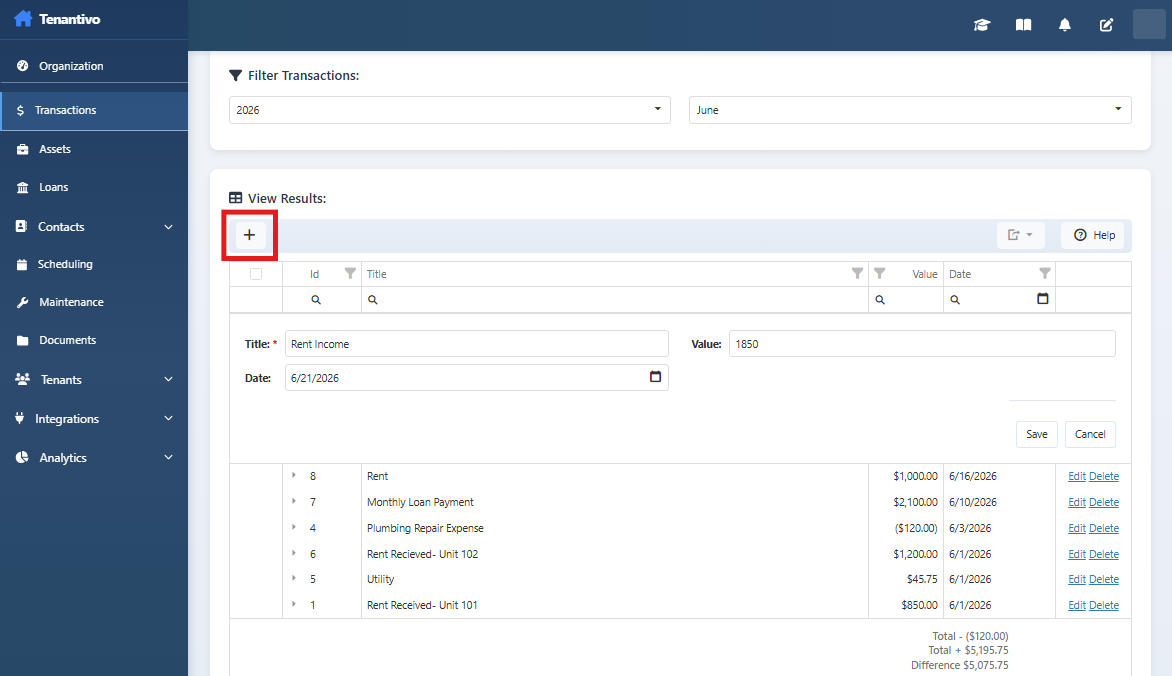
- On the Transactions page, click the Add button in the grid toolbar.
- Enter a Title, Value (positive for income, negative for expense), and Date.
- Click Save in the toolbar to add the row to the list.
Tip: New rows start as Not Marked until you approve them using Status Change.

Editing or deleting a transaction
- Click a row to open the edit form, or use the grid’s edit action.
- Update Title, Value, or Date as needed.
- Click Save to apply your changes, or Delete to remove the transaction.
Note: After correcting a transaction, change its status from Needs Review to Approved when the entry is correct.

Transaction details and links
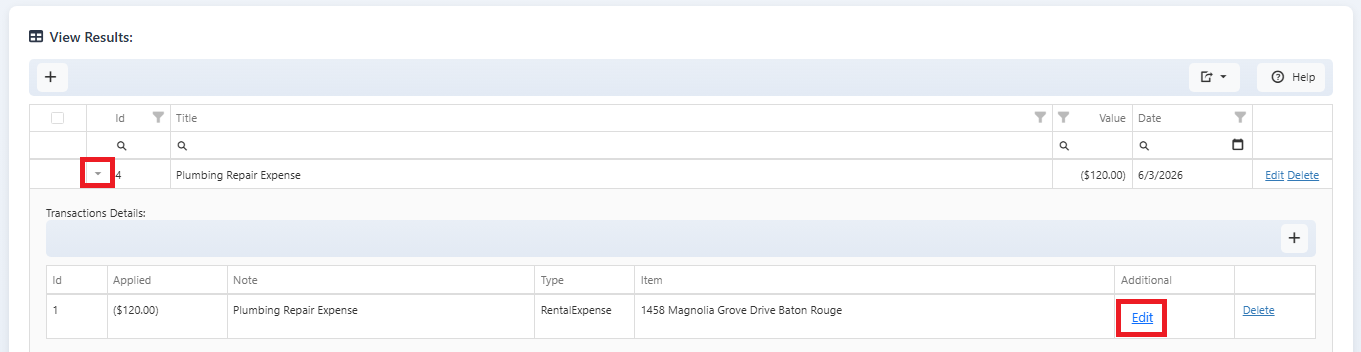
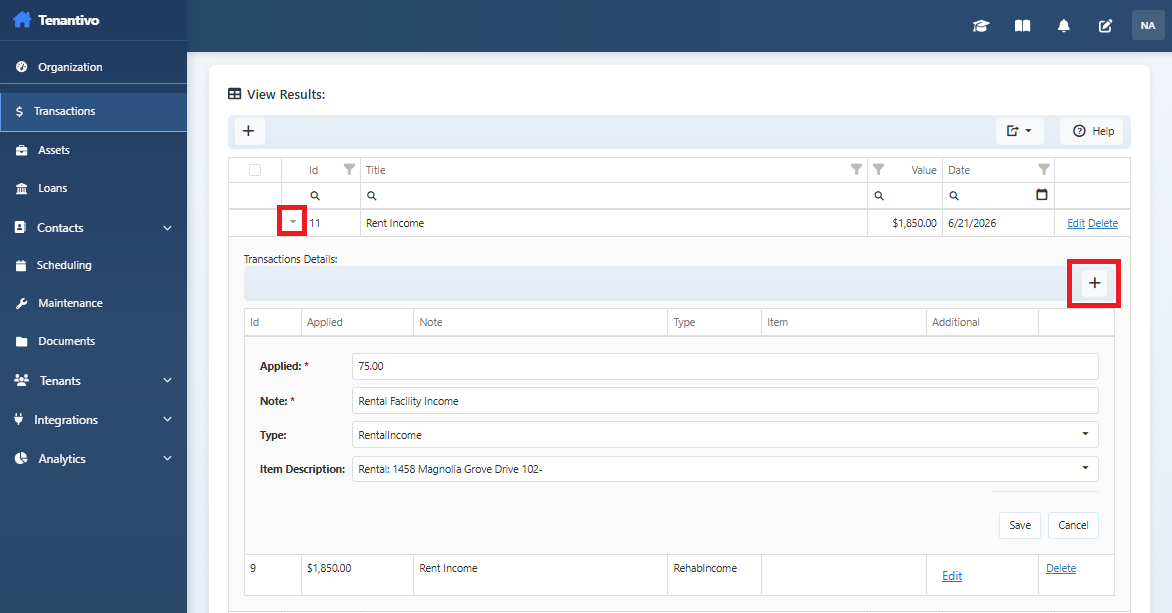
- Click the expand arrow on a transaction row to open Transaction Details.
- Add links that tie the transaction to a rental, expense type, loan, or other item.
- Enter the applied amount, note, type, and linked item, then save the link row.
Why it matters: Links connect each transaction to the correct property or category so reports and balances stay accurate.

Detail row associations
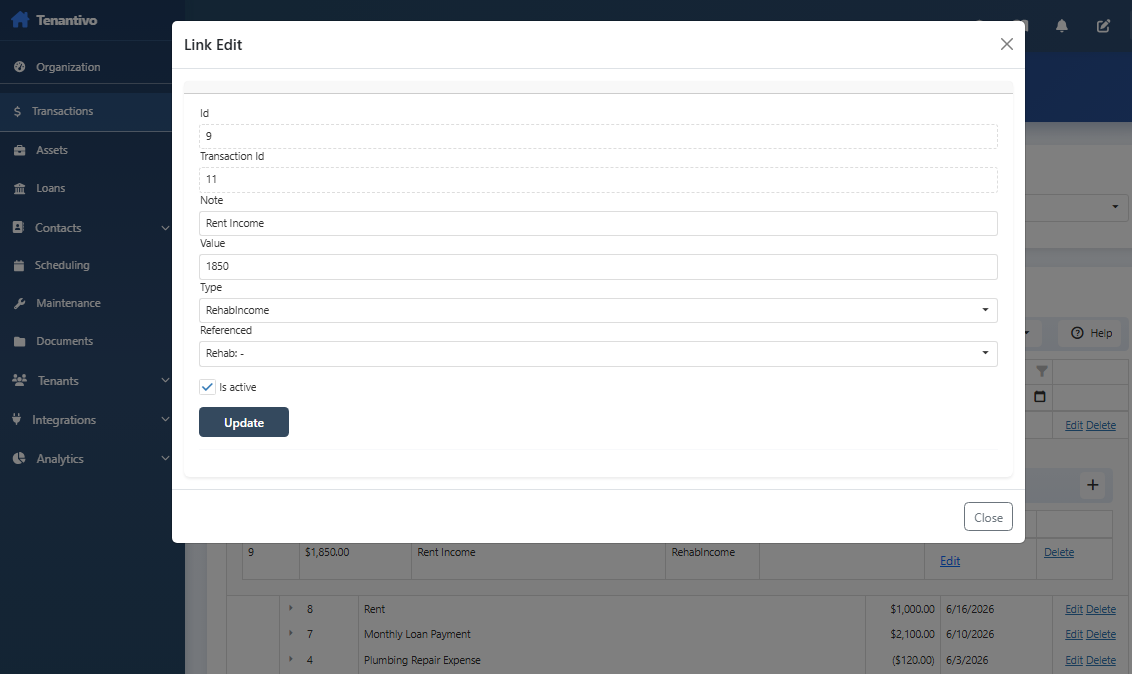
- Click the expand arrow on a transaction row to open Transaction Details.
- Add one or more detail rows that associate the transaction with a rental, expense type, loan, or other linked item.
- For each row, enter the applied amount, note, association type, and the item to link.
- Save each detail row. The transaction total should match the sum of associated detail amounts.
Why it matters: Detail row associations connect each transaction to the correct property, category, or loan so reports, balances, and property-level totals stay accurate.

Transaction Entry Guide (Help)
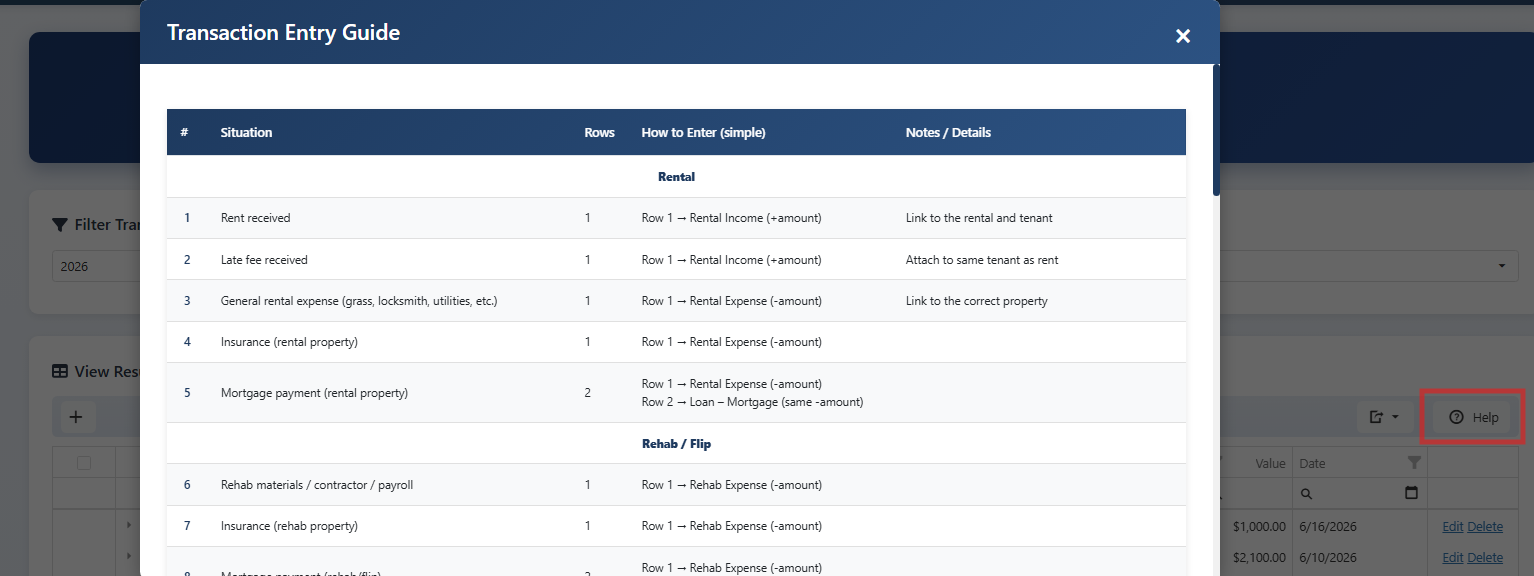
- On the Transactions page, click Help in the grid toolbar.
- Review the Transaction Entry Guide for common situations (rent received, mortgage payment, rehab expense, and more).
- Use the guide to decide how many link rows to add and which categories to use before you approve the transaction.
Tip: When you are unsure how to categorize an entry, leave the row as Needs Review until you confirm the correct link type in the guide.